
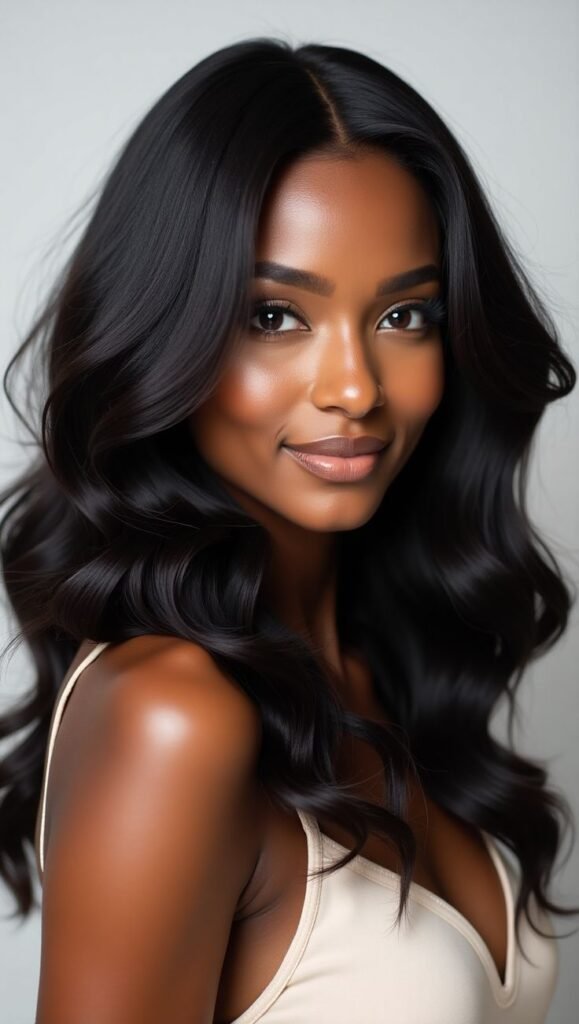
The quest for the “perfect melt” is the holy grail of the hair world. We’ve all seen those mesmerizing videos where a full lace frontal seemingly vanishes into the skin, leaving behind nothing but a natural-looking hairline that defies even the closest inspection. But for many, achieving that level of realism feels like a guarded industry secret.
If you have ever struggled with a hairline that looks too thick, lace that appears gray or “ashy,” or an install that just doesn’t sit right, this guide is for you. Customizing a lace frontal is an art form that combines technical skill with an eye for detail. In this comprehensive breakdown, we will dive deep into the professional techniques required to customize your unit, from bleaching knots to advanced plucking, ensuring your next install is indistinguishable from your natural hair.
Understanding the Foundation: What Makes a Full Lace Frontal Unique?
Before we pick up the tweezers, we have to understand the canvas. A full lace frontal typically spans from ear to ear, usually in dimensions like 13×4 or 13×6 inches. Unlike a standard closure, the frontal covers your entire natural hairline. This offers unparalleled versatility—allowing you to pull your hair back into high ponytails or deep side parts—but it also means there is more lace to hide.
For those looking for even more coverage, the 360 lace frontal wig has become a popular alternative, providing lace around the entire circumference of the head. Regardless of which you choose, the goal remains the same: the lace must mimic the scalp.
The Importance of Lace Quality
Not all lace is created equal. To achieve a true “melt,” the denier (thickness) of the lace matters.
- HD Lace: The thinnest and most delicate, offering the fastest melt.
- Transparent Lace: Great for lighter skin tones or those who plan to use lace tint.
- Swiss Lace: Durable and standard, often requiring a bit more customization to disappear.
Step 1: The Chemical Magic of Bleaching Knots
Every hair on a full lace frontal is hand-tied into the lace base using tiny knots. On dark hair units, these knots look like tiny black dots against the “scalp.” Bleaching these knots is the first and most crucial step in customization.
How to Bleach Like a Pro
- The Consistency: Mix your bleach and developer into a thick, “cake frosting” consistency. If it’s too runny, it will seep through the lace and bleach the hair roots (creating “hot roots”).
- The Application: Gently pat the mixture onto the underside of the lace. Do not press hard. You want the bleach to sit on the knots, not the hair.
- The Timing: Monitor the knots every 5 to 10 minutes. You are looking for them to turn a honey-blonde or pale yellow.
- The Neutralizer: Use a neutralizing or purple shampoo immediately after rinsing to stop the chemical process and remove any brassy orange tones.
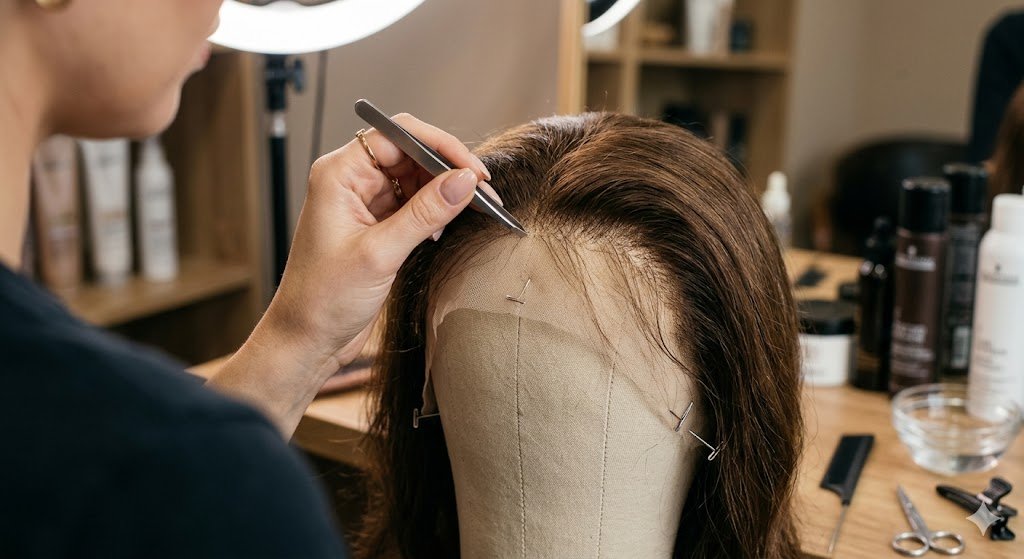
Step 2: Mapping and Plucking for Natural Density
Real hairlines are not perfect, straight lines. They are irregular, with gradients of density. Most lace frontal units come “pre-plucked,” but they are rarely thin enough for a truly professional look.
Creating the Gradient
To avoid a “wiggy” appearance, you need to create a transition from thin hair at the very front to thicker hair toward the back.
- The Sectioning Method: Pin the hair back and work on one small section of the hairline at a time.
- The “Skip-Plucking” Technique: Don’t pluck in a straight line. Move your tweezers in a zig-zag motion to create the unevenness found in nature.
- The Behind-the-Hairline Thinning: Step back about an inch from the edge and pluck sections from the inside. This reduces bulk so the hair lays flat against your head rather than “humping” up.
Step 3: Tinting the Lace to Match Your Melanin
A full lace frontal will only melt if the lace color matches your skin tone perfectly. If the lace is too light, it will look like a white line; if it’s too dark, it will look like a shadow.
- Lace Tint Sprays: These are the fastest way to match your tone. Spray the underside of the lace and blow-dry.
- The Makeup Method: If you’re in a pinch, using a cream foundation or a pressed powder that matches your forehead color is highly effective. Apply it to the lace using a makeup brush before the install.
- Tea Staining: For a more permanent DIY solution, some enthusiasts use black tea to stain transparent lace to a warmer brown hue.
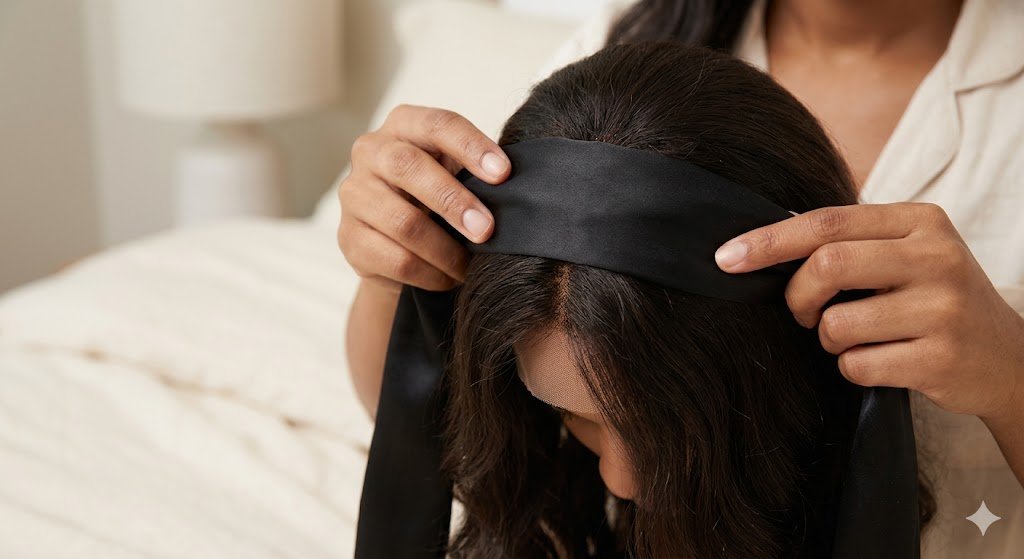
Step 4: The Install—Glueless vs. Adhesive
The final step in the “melt” is how the frontal is attached to your skin.
The Bold Hold Method (Adhesives)
Using a specialized lace glue allows for a long-wear install (1–3 weeks). The secret here is thin layers. Apply the glue, wait for it to turn completely clear, and then lay the lace. Use a “melt band” or a silk scarf to tie the hairline down for at least 10–15 minutes after the install. This pressure is what fuses the lace to the skin.
The Glueless Route
If you prefer to remove your lace frontal daily, use a lace-holding spray or a firm-hold gel. These products provide a temporary “melt” without the commitment of waterproof adhesives, protecting your natural edges from long-term tension.
Pros and Cons of Customizing Your Own Frontal
While the results are stunning, it is important to weigh the effort against the outcome.
Pros:
- Extreme Realism: You can tailor the hairline to match your specific forehead shape.
- Cost Savings: Customizing yourself saves the high fees charged by professional stylists.
- Versatility: A well-customized 360 lace frontal wig allows for any hairstyle, including high buns and cornrows.
Cons:
- Risk of Damage: Over-bleaching can lead to shedding, and over-plucking can create bald spots on the lace.
- Time Consuming: A proper customization session can take 2 to 4 hours.
- Learning Curve: It takes practice to master the “tension” required for plucking without ripping the delicate lace.
Frequently Asked Questions (FAQs)
Q: Can I customize a synthetic lace frontal? A: You cannot bleach the knots on synthetic hair because the fibers do not react to bleach. However, you can pluck the hairline and use concealer to hide the knots.
Q: How often should I re-pluck my frontal? A: You should only pluck your full lace frontal once. However, as the hair naturally sheds over time, you may find the hairline thinning further on its own.
Q: Why does my lace look white after I install it? A: This is usually because the lace wasn’t tinted or the glue didn’t dry clear. Try dabbing a bit of skin-toned powder over the lace to dull the “flash.”
Q: Is a 360 lace frontal wig better than a standard frontal? A: It depends on your styling needs. If you only wear your hair down or in low ponytails, a standard lace frontal is sufficient. If you want total styling freedom, the 360 version is the better investment.

Conclusion: Practice Makes Perfect
Achieving the perfect melt with a full lace frontal is a journey of trial and error. By mastering the sequence of bleaching, plucking, and tinting, you take full control over your aesthetic. Remember that the goal isn’t perfection—it’s naturalism. Real hair has flaws, flyaways, and an imperfect hairline.
Whether you are working with a standard frontal or a high-end 360 lace frontal wig, the time you spend on the details is what separates a “wig” from a “mane.” Start slow, be gentle with your lace, and soon you’ll be the one people are asking for the “secret” to a flawless melt.

Sign up