Creating embroidery-ready designs can seem tricky at first. But with the right steps and tools, anyone can turn a simple artwork into a clean, machine-ready file. Whether you are a hobbyist or a professional, understanding the process ensures that your embroidery projects look sharp and polished.
Understanding the Basics of Machine-Ready Designs
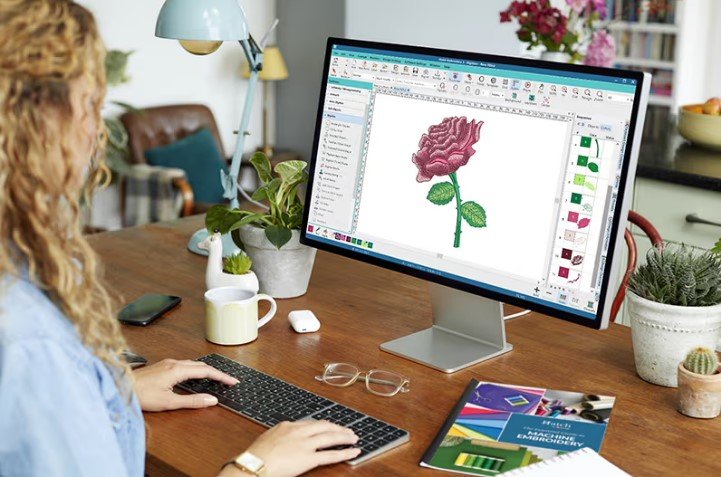
Before we dive into the process, it’s important to understand what a machine-ready format is. In simple words, it is a digital file that your embroidery machine can read and stitch automatically. These files guide the machine on how to move, where to place stitches, and the color sequence to follow.
Having a clean design saves time and prevents mistakes during stitching. Poorly prepared files can lead to uneven stitches, thread breaks, or messy results.
Why File Conversion Matters
Sometimes, your design starts as an image or vector file. To make it usable for embroidery, it needs to be converted into a specific format the machine recognizes. For example, you might need to use a PES File Converter to turn a PNG or JPEG into a PES format that works for your machine.
File conversion is not just about changing the format. It also ensures that the design retains its quality. Colors, details, and proportions must stay accurate after the conversion.
Step 1: Choose the Right Design
Not all designs are suitable for embroidery. Simple images with clear outlines work best. Here’s what to look for:
- High resolution – Blurry images will not stitch well.
- Minimal fine details – Tiny elements may get lost during stitching.
- Bold colors – Strong contrast helps the embroidery stand out.
Starting with the right design makes the entire process easier. Even complex logos can work if simplified and cleaned before conversion.
Step 2: Clean Up Your Artwork
Before converting, the artwork needs preparation. You can do this with software like Adobe Illustrator, CorelDRAW, or free alternatives.
Tips for Cleaning Your Design
- Remove unnecessary background elements.
- Simplify lines and shapes.
- Adjust colors for embroidery thread matching.
- Ensure all parts are closed shapes to avoid stitching errors.
Cleaning the artwork ensures the converted file will be accurate and easy for your machine to read.
Step 3: Choose the Right Format
Different embroidery machines read different file formats. Some popular formats include:
- PES – Used by Brother and Babylock machines.
- JEF – For Janome machines.
- DST – For industrial embroidery machines.
Knowing your machine’s preferred format helps you select the correct conversion tool. Using the wrong format may result in errors or unreadable files.
Step 4: Convert Your Design
After preparing your artwork, it’s time to convert it. This step turns your cleaned design into a stitch-ready file. Using a PES File Converter or similar software ensures that the file is compatible with your machine.
Tips for Successful Conversion
- Keep the original file as a backup.
- Double-check the design dimensions.
- Adjust stitch density if needed.
- Preview the file in a stitch simulation before saving.
Conversion software often lets you test how the design will look when stitched. This step saves time and prevents mistakes during actual embroidery.
Step 5: Check the Design for Errors
Once converted, reviewing the design is essential. Look for these common issues:
- Missing or broken lines
- Overlapping stitches
- Too tight or loose stitch density
Correcting errors digitally is much easier than fixing them on fabric. Some software tools allow you to tweak stitch paths and correct issues before stitching.
Step 6: Test Stitch Your Design
Even after careful preparation, always test stitch a sample on similar fabric. This step helps you identify:
- Any thread breaks
- Areas that may pucker
- Color adjustments needed
Testing ensures that the final project will come out clean and professional.
Step 7: Save and Organize Your Files
Once your design is perfect, save it in a dedicated folder. Include both the original artwork and the converted machine-ready file.
Organization Tips
- Name files clearly with project details
- Keep a separate folder for test stitches
- Back up your files on cloud storage or an external drive
Good file management saves time for future projects and prevents accidental loss of designs.
Common Mistakes to Avoid
Even experienced users can make mistakes. Here are some pitfalls to watch out for:
- Using low-resolution images
- Ignoring stitch density adjustments
- Forgetting to test stitch the design
- Using unsupported file formats
Avoiding these mistakes ensures a smooth process and perfect results.
Benefits of Proper Machine-Ready Files
Preparing your designs carefully has many advantages:
- Cleaner stitches – Designs look professional.
- Faster stitching – Machine runs smoothly without errors.
- Consistent results – Each project matches the original artwork.
- Time and cost savings – Fewer errors mean less wasted fabric and thread.
Using the right conversion and preparation methods creates designs that are both visually appealing and technically sound.
Tools and Software Recommendations
Here are some tools to make your workflow easier:
- PES File Converter – Converts designs into machine-ready PES files.
- Adobe Illustrator or CorelDRAW – For cleaning and vectorizing artwork.
- Embird or Wilcom – For advanced stitch simulation and editing.
These tools provide both precision and efficiency. They also let you preview your designs before stitching, which is invaluable.
Final Tips for Success
- Start with simple designs before moving to complex ones.
- Always test stitch before finalizing.
- Keep learning new software tricks and embroidery techniques.
- Back up all files to avoid losing important designs.
Consistent practice and attention to detail make a huge difference in embroidery results.
Conclusion
Turning any design into a machine-ready format doesn’t have to be complicated. By choosing the right artwork, cleaning it, converting it properly, and testing your files, you can achieve clean, professional embroidery every time.
With tools like Digitizing Buddy, you can simplify the process, save time, and create perfect stitch files that bring your designs to life. Following these steps ensures your embroidery projects are always accurate, smooth, and high-quality.
Investing time in proper preparation and file management builds trust in your work, whether for personal projects or professional business use. Start with one design today and see the difference a well-prepared machine-ready file makes!


Sign up